Male Reference Poses: Master the Male Figure in 2025
Struggling with stiff male figures? Our 2025 guide to male reference poses includes anatomy tips, a 30-day practice plan, and pro tools to master dynamic male drawing, photography, and design.
Key Takeaways
Male reference poses help you capture believable weight, rhythm, and attitude in male figures.
Match your goal (gesture, anatomy, fashion, action) to the right kind of reference.
3D posing apps give full control and export options that plug into modern AI workflows.
A clear practice system beats random sketching; use a progressive 30-day plan.
Respect licensing, choose higher-quality sources, and build from fundamentals for consistent results.
Why Your Art Needs Male Pose References
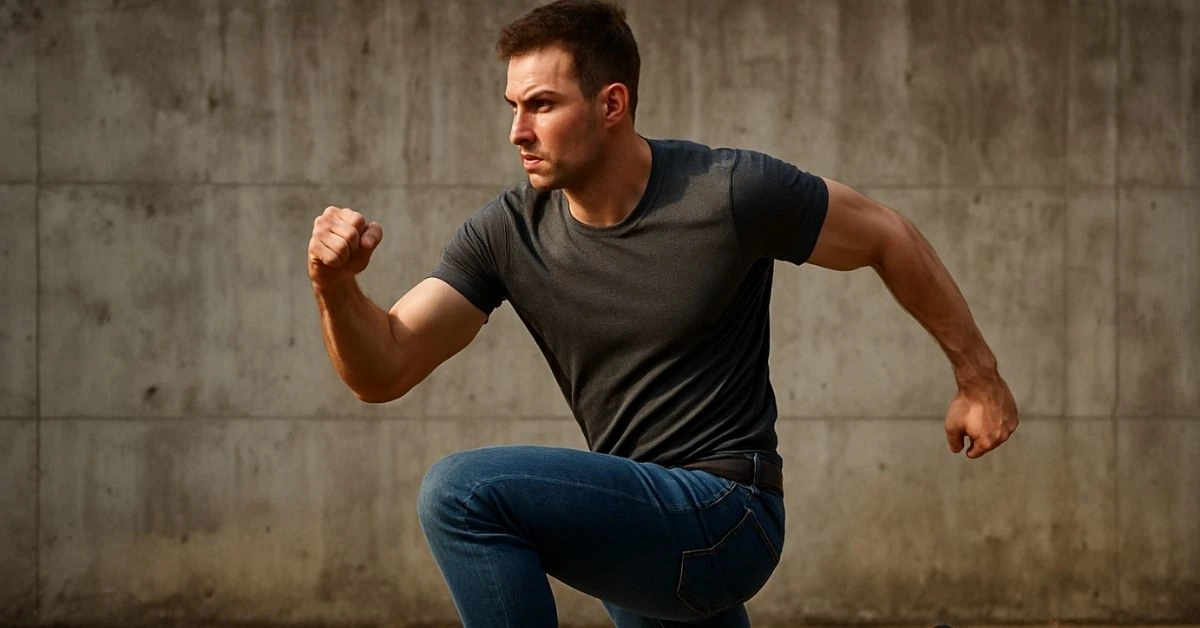
Let’s be honest: drawing convincing men from imagination is tricky. Shoulders get stiff, hips don’t track, and dynamic movement turns into a wooden stance. Male reference poses act like coaching for your eye. They teach balance, rhythm, and believable anatomy—fast. Good references also shorten the distance between idea and finish, whether you’re sketching a comic panel, lighting a photoshoot, or blocking a 3D scene.
How to Choose the Right Male Reference
Start with your end goal and work backward.
Gesture practice: Timed male reference poses train you to see flow and weight before detail.
Anatomy study: High-resolution references reveal landmarks and planes that guide muscle placement.
Fashion/editorial: Poses emphasize confidence, silhouette, and clean lines for styling.
Action/dynamic: Look for twist, compression, extension, and foreshortening that tell a story.
Pick the few references that serve today’s goal and ignore everything else. Focus beats endless scrolling.
Understanding Male Anatomy for Poses
Great poses stand on solid structure. Keep these checkpoints in mind whenever you study male reference poses:
Shoulder–hip relationship: Men generally present broader clavicles and narrower hips. Check the tilt between ribcage and pelvis to avoid straight, “locked” torsos.
Center of mass: In standing poses, trace a plumb line from the neck base through the planted foot. If the line misses the base of support, adjust or you’ll lose balance.
Landmarks that never lie: External occipital protuberance, acromion, 7th cervical vertebra, sternum notch, ASIS points, patella. Simplify forms around these “anchors.”
Major masses first: Think ribcage (egg), pelvis (bowl), cranium (sphere), then connect with cylinders. Muscles come later.
Planes and light: On male torsos, the plane shifts across pecs, serratus, and obliques define form more than contour. Study how light climbs and falls over those planes.
From Reference to Finish: A Case Study in Four Passes
Pass 1: Gesture (30–60 seconds). Mark the line of action, shoulder and hip tilt, and the weight-bearing leg. Keep it loose and rhythmic.
Pass 2: Construction (2–5 minutes). Drop in ribcage and pelvis, align them with a quick spine curve, then add cylinders for limbs. Check the planted foot under the center of mass.
Pass 3: Anatomy & Design (5–15 minutes). Add primary muscle groups that support the pose: pec–deltoid tie-in, lat sweep, oblique–iliac crest rhythm, quadriceps block. Simplify hands into planes.
Pass 4: Surface & Style (variable). Sharpen edges where bones approach the surface (acromion, patella), soften where muscle or fat adds roundness. Push gesture without breaking structure.
This four-pass routine turns any male reference poses—from calm standing to airborne kick—into believable figures with momentum and purpose.
The Best Free Male Pose Reference Sites
Line of Action: Built for timed sessions, perfect for gesture drills and daily warm-ups.
SketchDaily: Offers a massive, fast-loading library of male poses for rapid practice.
QuickPoses: Filters by gender and supports both short and long pose sessions.
AdorkaStock (Free Gallery): Artist-run, curated poses with clean silhouettes and lighting.
3D Posing for Control and Modern Workflows
3D apps let you set exact camera height, focal length, and lighting—then pose, duplicate, and iterate without scheduling models. For artists, they’re a sandbox for composition and foreshortening. For photographers, they help pre-visualize shots. For tech-savvy creators, 3D rigs can export pose data (like skeletal guides or depth maps) that condition AI image tools so your final output follows your intended posture.
Tips to avoid “plastic” results:
Start with a real male reference pose, then rebuild it in 3D; keep the asymmetry and subtle weight shifts.
Offset shoulders and hips, bend one knee, and stagger feet to break mannequin stiffness.
Light the model with a single strong key at first; add fill only after the forms read.
When Paid Male Reference Packs Make Sense
Time is money on professional work. High-resolution packs deliver consistent lighting, focal length, and angles across hundreds of poses. That consistency pays off when your task needs six variations of a jump, three camera heights, and clean anatomy. Think of paid packs as project accelerators: you spend once, use repeatedly, and keep your style intact because you’re not fighting low-quality source images.
A simple rule: if your deadline is tight or your subject needs specific motion (martial arts, athletics, period armor), buy once and gain a library you’ll reuse all year.
Free vs. Paid vs. 3D: Choosing Your Tool
| Tool Type | Best For | Pros | Cons | Top Pick |
|---|---|---|---|---|
| Free Sites | Beginners, daily warm-ups, gesture | Zero cost, huge variety, timers | Mixed quality, inconsistent lighting | Line of Action |
| Paid Packs | Pro projects, consistent angles | High-res, controlled lighting, themes | Cost, narrower themes | Grafit Studio |
| 3D Posing Apps | Unusual angles, planning, AI | Infinite poses, camera control, exports | Learning curve, can feel digital | PoseMy.Art |
A 30-Day Progressive Practice Plan
Week 1 – Gesture & Flow (daily 25–35 min):
10×30-sec male reference poses to warm up.
10×1-min poses to push rhythm.
2×5-min poses to capture simple masses.
Focus: line of action, shoulder–hip tilt, weight leg.
Week 2 – Construction & Form (daily 35–45 min):
6×2-min poses to place ribcage and pelvis.
3×5-min poses to add limb cylinders and head planes.
1×10-min pose to refine proportions.
Focus: alignment of masses and believable balance.
Week 3 – Light & Planes (daily 35–45 min):
4×5-min poses studying chest and abdomen planes.
2×10-min poses blocking light/shadow with two values.
1×10-min pose to clarify edge hierarchy (hard vs. soft).
Focus: readable torsos, simplified lighting.
Week 4 – Dynamics & Foreshortening (daily 45–60 min):
6×2-min dynamic gestures (twist, reach, jump).
2×10-min poses exploring extreme camera angles.
1×20-min finish using the four-pass method.
Focus: push action without breaking structure.
Photographer’s Corner: Translating Poses to the Camera
If you shoot portraits or lifestyle sets, male reference poses become direction cues:
Hands in pockets, weight on back leg: Relaxed confidence; great for streetwear or corporate casual.
Arms crossed, slight lean: Stability, authority—avoid locking elbows to keep it natural.
Seated forward lean, elbows on thighs: Engagement and focus; flattering for most builds.
Walking toward camera, mid-step: Energy without strain; use a longer focal length to compress and simplify.
Wall lean with one foot up: Casual asymmetry; watch shoulder level to avoid slouch.
Common Mistakes and How to Fix Them
Mannequin stance: Offset the hips and bend a knee. Add a head tilt.
Floating feet: Plant the weight foot under the center of mass; flatten the heel.
Over-detailing early: Build masses first, then place major muscle groups.
Symmetry trap: Stagger hands, rotate the torso slightly, and vary the shoulder heights.
Ignoring planes: Block large light shapes before texture; the torso reads through value, not outline.
Ethical and Licensing Basics
Treat every reference with respect. If terms of use are unclear, don’t publish derivative work. Free training sites and artist-curated libraries often include clear practice allowances. Paid packs typically grant broader usage for finished art. With 3D setups, you control the source; still, keep model rigs and app licenses within their terms. If you route poses into AI tools, read the generator’s license before commercial use.
Toolkit: Build a Reliable Reference Workflow
Daily: One short gesture block from male reference poses (10–15 minutes).
Project start: Thumbnail three ideas, then pick references that match angle, mood, and body type.
Pre-final: Validate balance and landmarks; overlay a quick skeleton if anything feels off.
Finish: Tighten edges near bony landmarks and soften over major muscles to avoid “carved” looks.
Advanced Tips That Raise the Ceiling
Contrapposto with intent: Counter-tilt shoulders and hips, then curve the spine between them for an elegant S-shape.
Hands as story tools: Relaxed fingers say calm; spread fingers add tension; fists read as power.
Foreshortening shortcut: Aim the long axis of the forearm or thigh directly at camera, then compress the far planes; keep overlap clear.
Silhouette first: Before detail, fill the figure black and check if the pose reads. If not, fix the silhouette.
Reference blending: Start from one male reference pose for structure and borrow hands or head angle from another—just keep the weight and perspective consistent.
Recommended Tools and Resources
Best Free Practice Site: Line of Action
Best Paid Pack for Action Poses: Grafit Studio (ArtStation)
Best 3D App for AI Workflows: PoseMy.Art
Best Beginner-Friendly 3D App: JustSketchMe
Best Curated Artist-Run Library: AdorkaStock
Frequently Asked Questions (FAQs)
What are male reference poses?
Male reference poses are photos or 3D setups used to study and create believable male figures. They help you capture weight, balance, and proportion so your drawings, designs, or photos feel grounded and expressive without guesswork or stiff results.
How do I practice with them effectively?
Start with timed gestures to train speed and rhythm, then add construction for accuracy. Use a progressive plan: short poses in week one, structure in week two, lighting in week three, and dynamic foreshortening in week four. Review one saved pose daily to track improvement.
Should I use free, paid, or 3D references?
Use free sources for habit and variety, paid packs for high-quality, consistent angles under deadlines, and 3D when you need exact camera control or unusual viewpoints. Many artists mix all three depending on the project and timeline.
How can I avoid stiff, mannequin-like results?
Offset the hips and shoulders, bend one knee, and vary the head angle. Push asymmetry and check the center of mass over the planted foot. Start with gesture, not details. Add light and plane changes before rendering surface texture.
What licensing rules should I follow?
Only publish work based on sources with clear terms. Training sites and curated libraries usually allow practice; paid packs often permit broader commercial use. 3D poses you create are safest, but always respect your software’s license and any AI tool’s output terms.
Are male and female posing fundamentals different?
The workflow is similar, but proportions and center of mass cues differ. Male figures often read with broader clavicles, thicker deltoids, and squarer ribcage planes. Emphasize shoulder-hip relationships and planar changes on the torso for a clear, masculine read.
How do I handle foreshortening in male action poses?
Place the camera mentally. Aim the limb toward the lens, exaggerate overlaps, and simplify into big blocks before detail. Check perspective with quick boxes for the thigh, forearm, and hand so depth reads cleanly even at speed.
What’s a quick daily warm-up?
Do 10 gestures at 30 seconds each, then two 2-minute studies focusing on ribcage–pelvis alignment and a single light source. Finish with one 5-minute pose to lock structure. The whole routine takes under 20 minutes and compounds fast.
Conclusion
Male reference poses aren’t a crutch; they’re a training ground and a production shortcut. Match your goal to the right source, build poses from gesture and structure, and use lighting and planes to clarify form. When deadlines hit, lean on paid or 3D tools for control and consistency. With a simple daily habit and the 30-day plan, you’ll see stronger silhouettes, cleaner anatomy, and confident, dynamic male figures in everything you make.


